
Valentine’s Day is fast approaching, so here is a classic rose nail art Step By Step created by Louella Belle Educator, Natalie Gartland.
Natalie offers training in Artistic Colour Gloss, IBX and Putty and is based in Bradford.
1. Using Bride from the Artistic Colour Gloss Collection, apply two coats, curing each one for 30 seconds.

2. Start by making a ‘C’ shape and work outwards making the shape bigger each time. I used a selection of pinks from the Artistic Colour Gloss range. La-Ti-Da and Falling In Luster.

3. Keep working outwards to build the shape of your flower. Use different shades of pink as you go. Remember to cure for 30 seconds using your Artistic LED Pro 36 lamp, throughout the stages.

Step Four: At this stage, you can finish your flower or add a smaller one depending on how much space you have to work with.

Step 5: Optional, repeat steps two and three for the smaller roses.
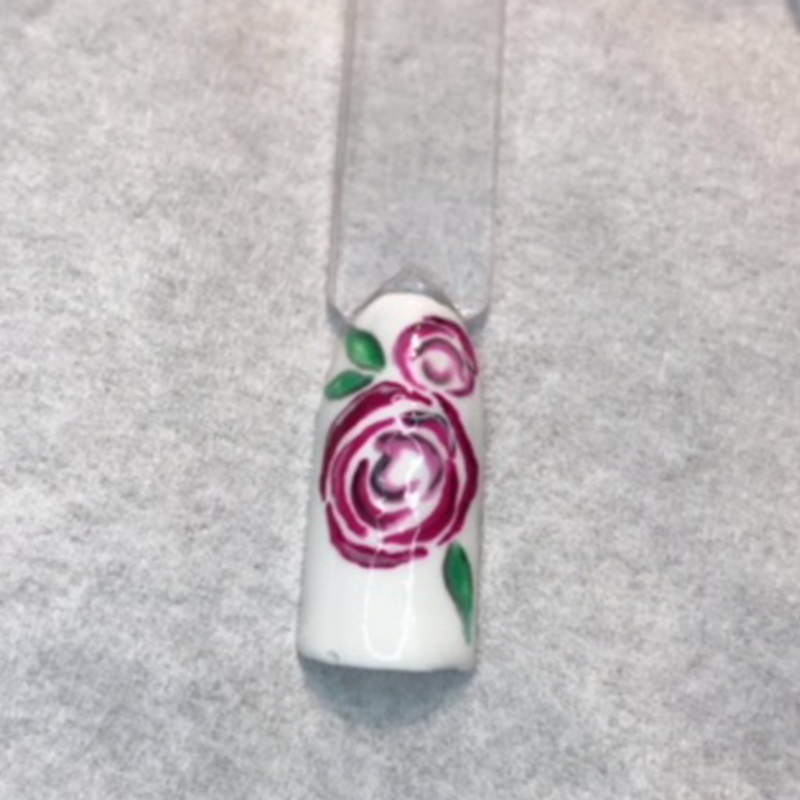
Step 6: Add leaves using Envied and Killer Stems. Cure for 30 seconds

Step 7: Add definition by outlining using Swag and Bride and cure.
Finish with Artistic Glossing Gel and cure for 30 seconds. Use Nail Surface Cleanser to remove the sticky residue.

And here is the end result:

Tag us in your Valentine’s nail art creations on social media with the #louellabelle
Related Posts
-


Introducing the new Illusions 2019 collection by Morgan Taylor, launched into the brand’s luxurious Platinum range!
This ...


- Louella Belle on IBX & Boost - Get The Best Results
- emma hart on Discover Footlogix Before & Afters
- Tessa Reynolds on IBX & Boost - Get The Best Results
- Nadine on Have You Tried Our New Faux Mink Lashes Yet?
- Kirstie Baldwin on IBX & Boost - Get The Best Results
- January 2024
- December 2023
- November 2023
- October 2023
- September 2023
- July 2023
- June 2023
- April 2023
- November 2022
- October 2022
- September 2022
- August 2022
- June 2022
- March 2022
- February 2022
- January 2022
- December 2021
- November 2021
- September 2021
- August 2021
- July 2021
- June 2021
- May 2021
- November 2020
- October 2020
- September 2020
- August 2020
- July 2020
- June 2020
- May 2020
- April 2020
- March 2020
- February 2020
- January 2020
- December 2019
- November 2019
- October 2019
- September 2019
- August 2019
- July 2019
- June 2019
- May 2019
- April 2019
- March 2019
- February 2019
- January 2019
- December 2018
- November 2018
- October 2018
- September 2018
- August 2018
- July 2018
- June 2018
- May 2018
- April 2018
- March 2018
- February 2018
- January 2018
- December 2017
- November 2017
- October 2017
- September 2017
- August 2017
- July 2017
- June 2017
- May 2017
- April 2017
- March 2017
- February 2017
- January 2017
- December 2016
- November 2016
- October 2016
- September 2016
- August 2016
- July 2016
- June 2016
- May 2016
- April 2016
- March 2016
- February 2016
- January 2016
- December 2015
- November 2015
- October 2015
- September 2015
- July 2015
- June 2015
- May 2015
- March 2015
- February 2015
- January 2015